

Okay, so it's time to do the Linux installation lab. There are a couple of things that you'll need to know. Some of them are based on the concepts you already learned in the lab.
First, to do anything with a computer, you must be running an operating system. In other words, without an operating system, the computer cannot perform any function aside from that provided by the BIOS. This means that when installing an operating system, you must first load an operating system. If an operating system is already installed on the machine you're working with, and you are simply performing an upgrade, you can boot into that operating system first. If, however, no operating system exists on the machine, you must load an operating system from a CDROM or a floppy or some other removeable bootable media.
In our case, we will be using bootable CD images. Before coming to this lab, you should have downloaded three CDROM images from the CSCI Department's Software Download page. If you want, you may create the CDs from these images, but it isn't necessary. You can do the install straight from the CD images if they are stored to your drive.
Also, remember that the process of bringing up a PC involves:
We will, however, be using virtual machines, i.e., the operating system will be running an application that will simulate the operation of a PC. Huh? Okay, imagine a small PC being simulated as a window on your desktop. That is how we will be running Linux, and Windows XP for that matter. The next section of these instructions describes the virtual machine.
One of the components of the laboratory section of this course has always been the installation of operating systems. In the early days, the students simply installed the operating systems on the laboratory computer's hard drive. Any installations that where done in the morning section were overwritten by the evening section. If a hard drive failed either through wear or a student error, that computer was not available for the evening section. Failures were common. If a student was unable to complete a lab, they would have to start over from scratch during open lab hours because a student from a later class would have erased all of the previous student's work.
These problems were partially solved by requiring students to purchase an internal IDE hard drive which was installed in a carriage that could be inserted into the PC in order to perform the laboratory assignments. The student could then take the hard drive home, and the following week, the hard drive would be exactly as they'd left it from the previous lab.
Problems have arisen with the hard drive carriages, and a major push was made to go to USB external drives. The problem with external drives was that some of the machines did not support booting from the USB drives. That problem is solved by using a virtual machine.
A virtual machine is an instance of a computer running on a computer. The computer's resident operating system runs as normal, but an application creates a virtual instance of the computer's hardware on which a different operating system can be run. The number of virtual machines that can be created on a single machine is limited only by the size of the hard drive. The number of concurrently running virtual machines is limited mostly by the amount of memory installed on the physical machine.
There are many benefits of virtualization including:
To create a virtual machine, the user needs to create/configure a new virtual machine, install an operating system on it, then start the virtual machine. Aside from not having access to the BIOS setup, starting a virtual machine is just like booting your machine from a shutdown or restart.
Although there are a number of virtualization packages, the one we will be using in this class is Microsoft's Virtual PC. It is currently a free product downloadable from their web site at http://www.microsoft.com/windows/products/winfamily/virtualpc/default.mspx. Once you have created a virtual machine on your external drive, any machine that meets the minimum hardware requirements of your installation should be able to run it if Virtual PC has been installed.
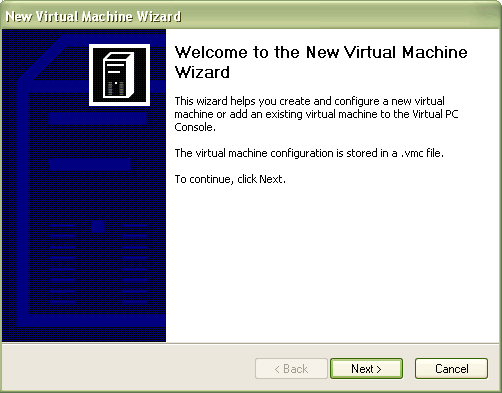
Begin by running Microsoft Virtual PC either from the Start menu or from the desktop icon. ![]() If no virtual machines have been defined, you will be greeted by a window asking you to create one. If virtual machines exist on this computer, you will most likely be greeted by the "Virtual PC Console" window. If this is the case, click on "New" to get the New Virtual Machine Wizard to appear.
If no virtual machines have been defined, you will be greeted by a window asking you to create one. If virtual machines exist on this computer, you will most likely be greeted by the "Virtual PC Console" window. If this is the case, click on "New" to get the New Virtual Machine Wizard to appear.
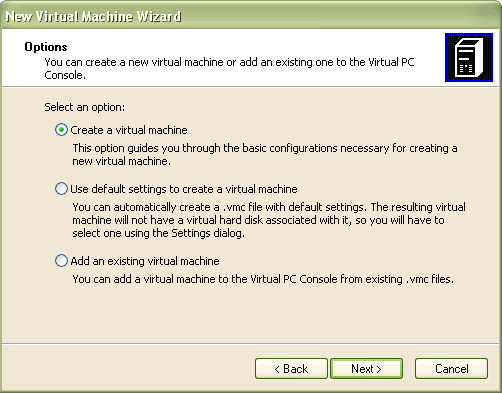
Clicking on "Next >" brings you to a window which allows you to select how you are going to create a new virtual machine. Select the option to "Create a virtual machine." We may have to use one of the other options if your virtual machine gets "lost" between labs. This is not a problem. If the computer is booted between labs without your drive connected, Virtual PC deletes the missing virtual machines from its list. When you reconnect your drive, we can use one of the other options to allow Virtual PC to find your virtual machine.
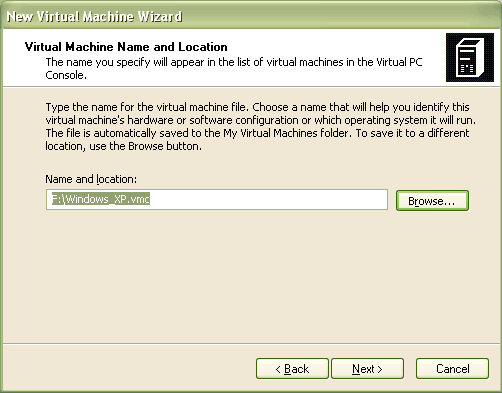
Once you've selected an option and clicked "Next >," you will be asked to identify and locate your new machine. In the text box, enter a name to identify your Linux installation. Once you've named the machine, click on "Browse" and select your external drive as the location to create this virtual machine. The window below shows that after you select the external drive as the destination, the drive letter is added to the beginning of your virtual machine's name and the file extension ".vmc" is placed at the end. In other words, I named my machine "Windows_XP," and when I had it stored to my F: drive, the additional text in the name and location were added. (Note: This description originally went with the Windows XP lab. Sorry for any confusion.)
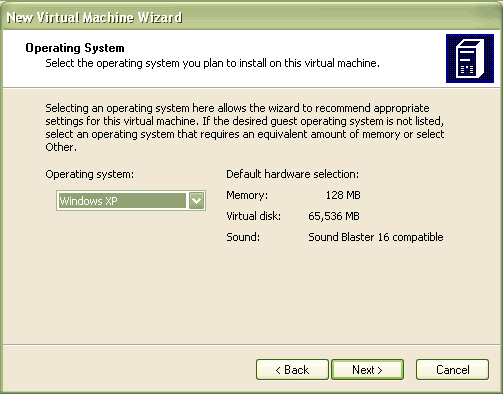
Once you save this virtual machine and click on "Next >," a new window appears asking you to select the operating system you wish to install. For our Linux installation, select "Other."
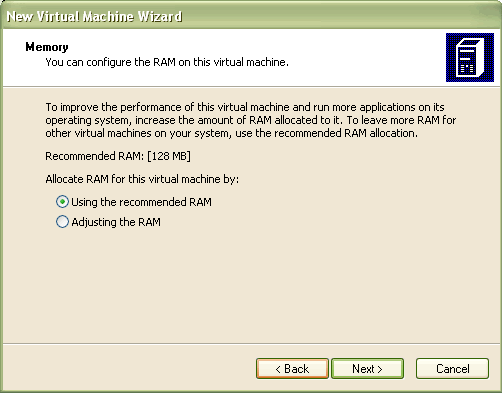
Use the next window to define the amount of RAM allocated to this machine. The recommended RAM should be fine.
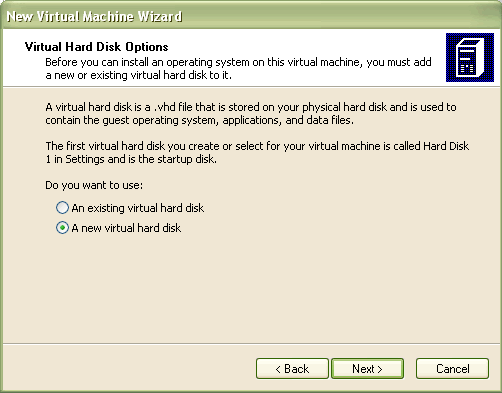
Your virtual machine, its operating system, applications, and contents will all be stored in a virtual hard disk. This essentially is a file with the extension ".vhd" that will be stored on your external drive. The next window allows us to use an existing virtual hard disk or define a new one for this new virtual machine we're creating. Define a new virtual hard disk as shown below.
Clicking on "Next >" brings up a window that allows you to define the location and size of this new virtual hard drive.
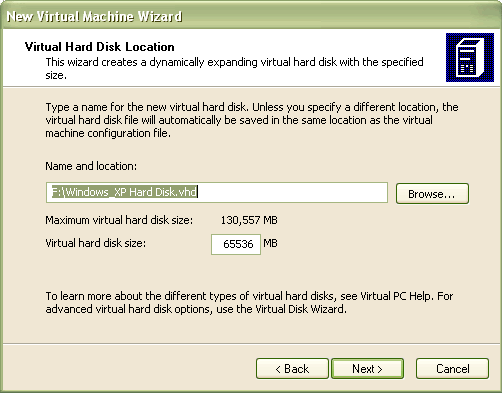
Depending on the size of your external drive, you may want to shrink the size of your virtual hard disk. Beware that depending on your installation, you will probably require 3 Gigabytes. If you want to be safe, set the size to 6 to 10 Gigabytes. Clicking on "Next >" should present you with a window that says you've successfully created a new virtual machine. Clicking "Finish" should take you to the "Virtual PC Console" with your newly created virtual machine listed in the list of machines.
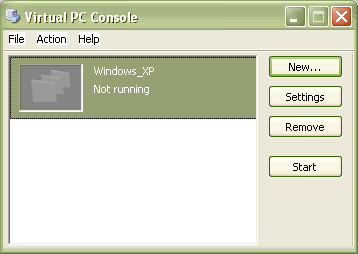
From this console, you can create new machines, modify the settings of existing machines, delete machines, or start a new instance of a machine. We will be starting a new instance. Your Linux machine should have a status of, "Not running." Select this machine and click on "Start." This will bring up a text window which will take you through the standard boot up of a new virtual machine (minus the BIOS portion). Alternatively, you can start a virtual machine by finding where your ".vmc" file is stored and double-clicking on that. That will not only start the machine, but it will also add the machine back to the Virtual PC Console if it has been removed.
Because you essentially have a computer running within a computer, there will be some confusion as to which computer is paying attention to the keyboard and mouse. For example, when running a virtual machine, which computer is going to pay attention to the keystroke combination CTRL-ALT-DEL? In this case, the host computer, not the virtual machine, receives the keystroke command.
Another problem is the mouse. When you click inside the window representing the virtual machine, the mouse pointer control is passed to the virtual machine. You will not be able to move the pointer outside the window. To return the mouse to the host machine, simply press the right-ALT key.
Most special commands are available from the Virtual PC menus, but there are some keystrokes that can be used to perform the same functions. All of these commands include the host key, which by default is the right-ALT key. The following table was modified from one found in the section, "Using the keyboard and mouse in a virtual machine," of the Virtual PC help.
| Key combination | Description |
| Host key+L | Restores Virtual PC Console from a minimized state. Moves Virtual PC Console to the foreground. |
| Host key+I | Installs Virtual Machine Additions. |
| Host key+ENTER | Toggles a virtual machine between full-screen mode and window mode. |
| Host key+DELETE | Sends CTRL+ALT+DELETE to the virtual machine operating system. |
| Host key+P | Pauses or resumes the virtual machine, depending upon its current state. |
| Host key+R | Resets the virtual machine. |
| Host key+F4 | Closes the virtual machine. |
| Host key+C | Copies the selected items. |
| Host key+V | Pastes a copied item. |
| Host key+A | Selects all. |
| Host key+E | Opens the virtual machine settings. |
| Host key+DOWN ARROW | Minimizes the virtual machine. |
| Host key+LEFT ARROW | Switches to the previous virtual machine when running multiple virtual machines, unless you are using full-screen mode. |
| Host key+RIGHT ARROW | Switches to the next virtual machine when running multiple virtual machines, unless you are using full-screen mode. |
To get started, we need to understand the boot up process of a computer. When you turn on a PC, there is a process that the processor goes through in order to run an operating system such as Microsoft WindowsTM. The general process has the following stages:
When a microprocessor first boots up, it has no clue. I'm serious. It's dumb as a rock. The first thing it needs to do is bring up its internal circuitry. This is what I'm calling the internal processor initialization. This involves simple things such as setting registers and the bits that control features to their default values. It is important to realize that at this point, the processor doesn't know how to communicate with anything except for a small amount of memory that contains non-volatile code. (Non-volatile means that it doesn't go away when the power goes away. RAM is not non-volatile.)
Once the processor has "come to", it needs to get some basic information such as how to access the hard drive, CDROM, or the floppy drive in order to load an operating system. This may seem trivial to you, but remember, when it first wakes up, the processor is dumb as a rock.
To do this, every PC contains a BIOS. BIOS stands for Basic Input/Output System, and it contains primitive software that shows the processor how to read from or write to devices such as the hard drive.
Once the BIOS has shown the processor how to access the hard drive or other media where the operating system is contained, the operating system can be loaded. The operating system contains the higher level software that allows the user to do things like:
Once the operating system is running, you need to load the "details". This would include things like software to allow access to "special" drives like a zip drive or a flash RAM. It might also include special drivers for high-performance video cards. In general, the drivers that were not needed for the PC to "come to" need to be loaded now so that the user can have access to them.
Okay, so that was a trick question. You can't run a computer without an operating system. But if that is true, how does a computer with a blank hard drive start so that you can load an operating system? Well, it's going to have to find an operating system on one of the other drives, either a floppy drive, a CDROM, or a removable drive such as a USB thumb drive.
In the past, the BIOS was only capable of seeing either the hard drive or the floppy drive. This was bad. It meant that for a new hard drive, the system had to be brought up using only the floppy drive. Since floppy drives only have a capacity of 1.44 megabytes, and even an old O/S such as Windows 95 took over a 100 megabytes, we had to load a stripped down version of the operating system. (For those of you who are familiar with DOS, the stripped down operating system is almost identical.) Once the stripped down version was loaded, we could then see the CDROM from which we would install the O/S to our hard drive.
Two problems resulted from this arrangement:
To solve this problem, newer PCs have BIOS's that are capable of booting from a CDROM, USB device, or even a network connection. In our lab, the GX280's have this capability. Since we are installing the O/S onto a virtual machine, we will only be able to use a floppy or a CDROM.
To install Linux, the installer will take you through the following steps which are much like the steps for installing any operating system.
Physical hard drives and logical hard drives are two different things. Just because you have one physical hard drive mounted in your PC doesn't mean that you couldn't have more than one hard drive designation. For example, when you look at Windows Explorer, you might see multiple drives listed as C:, D:, E:, etc.
Back in the old days, the largest hard drive that the Microsoft Disk Operating System (DOS) could recognize was 85 Megabytes. Not much, huh? So when larger hard drives came out, we needed to have a way to make them accessible to the user for storing program or data files. To do this, a larger drive was divided into smaller hard drives, no one of which was bigger than 85 Meg. This "dividing up" is referred to as partitioning. Still just one physical drive, but now the operating system thought it saw multiple drives. This division of the single physical drive was accomplished simply by storing a specific pattern of ones and zeros to the hard drive to designate the end of one partition and the beginning of another.
The application for partitioning in the Linux lab is a little different. No longer do we have the problem with seeing large hard drives. The problem is that the way Linux stores data is incompatible with how Windows stores it.
For example, imagine two people trying to share a filing cabinets. One of them stores everything by the date the document was received and the other stores everything in alphabetical order. Not too bad a problem, right? Well, ask one to find information from the other's filing system in the dark. Well, that's stupid! Not really.
If one operating system interprets the stored binary values differently than the other, they cannot share a common hard drive partition. So we will have to create separate partitions to run the separate operating systems of Linux and Windows. In fact, Linux will use two different types of partitions for two different purposes. In the end, your hard drive will have at least three partitions, one for Windows and two for Linux.
If we were going to create a dual-boot system with Windows XP, your hard drive would have one large partition starting at the beginning of the drive, but not extending to the whole drive. (When creating a dual-boot system, you should install the Microsoft operating systems first as they will not recognize the Linux installs.) This partition would contain a Windows installation. If there is some space left over, we could install Linux on the same drive.
| Windows 2K/XP Partition (2 Gig or larger) |
| Empty/raw hard drive |
Linux installations require at least two partitions. The figure below shows what it would look like if a single install of Windows and a single install of Linux were to share a physical hard drive by residing on three partitions.
| Windows
2K/XP Partition (2 Gig or larger) |
| Linux Swap Partition |
| Linux Native Partition |
Windows/DOS has a program called FDISK which allows you to partition your hard drive. It is, however, not really comprehensive, i.e., it doesn't handle Linux. The Linux installation software uses a program called Disk Druid to partition your drive. The operation of this program will be described in the procedure for the lab.
The following steps should allow you to begin the install of the Red Hat 9 Linux.
From here, the installation process is much like the installation process with any software. You begin by answering a lot of questions and then the software is copied to your drive, configured, then started. The next section outlines this process.
The following is a more detailed set of "cookbook" instructions. Following them does not necessarily mean that you understand the process, but that you can follow instructions. Please make an attempt to see that you understand what you are doing.
"shutdown -h now"Developed by David Tarnoff for all sections of CSCI 2150 at ETSU