
CSCI 2150
Windows XP Installation ISO Download
Downloading the Windows XP ISO
If you signed the MSDNAA agreement that was passed around in class, you should have received a username and password to the MSDN Academic Alliance. This would have been contained in an e-mail with a subject like, "Welcome to MSDN Academic Alliance: Online Software System." By following the instructions in the welcome message, you should be able to log into the download system using the username (most likely your e-mail address) and password they gave you. If you've already received a MSDNAA account and password for another course, then you will NOT receive the E-Mail containing duplicate account information. Simply log in using the username and password you received for the other course.
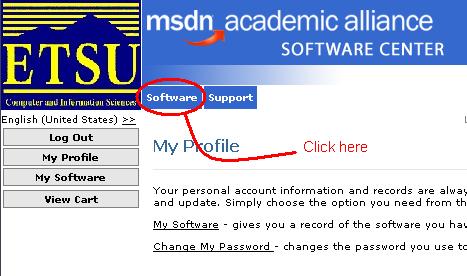
Once you've logged in, you should see a welcome screen like that shown below. At this screen, click on the blue button labeled "software."
On the new window that comes up, there should be a drop-down box labeled "Search by product title".
- Click on this box and select Windows XP Professional with SP3 (Single User) ISO Image. Click this link to see an image of what you should select.
- Clicking on "Go" should bring the product description up. It should say that the price is "Free". Click on the "Add to cart" button.
- The next screen is the licensing agreement. After reading and agreeing to the statement, click on the button at the bottom of the screen labeled "I agree". This should bring up your shopping cart. Click on the button to check out.
- Next, a Customer Information screen should appear. Fill in the requested information and click on the "Next" button.
- At this point, the details of your order will appear. Print this out to keep as a copy for your records.
- Click on the word "Download" next to your software title to begin your download.
The next step is very important. If you do not bring the copy of the serial number that MSDNAA gives you to the lab, you will not be able to complete the installation.
- The next screen should have copy of the serial number you will be using. PRINT THIS OUT TO KEEP AND BRING A COPY TO THE LAB SO YOU CAN ENTER THE SERIAL NUMBER DURING INSTALLATION. Click here to see a screen shot showing where the serial number is located.
- Finally, click on the button labeled "Download" to begin your download. The file you are downloading is not the actual CD image. Instead it is a program that will begin the download for your machine. Mine was named, "Downloader_for_Windows_XP_Pro_SP3.exe."
- Run the program you just downloaded and follow the Instructions to receive the ISO image.
- Upon completion, the Microsoft application you used to download the ISO will ask you if you want to launch the install. DO NOT LAUNCH THE INSTALL! The ISO will can be found in a subdirectory (mine was "Windows XP Professional with Service Pack 3 (x86) - CD (English)"). My ISO was named, "en_windows_xp_professional_with_service_pack_3_x86_cd_x14-80428.iso".
Be sure to bring the ISO file with you to class. This will be what we mount to the new virtual machine to perform the installation
Developed by David Tarnoff for CSCI 2150 -- Computer Organization at ETSU