Home Page View Syllabus Projects Page Documents Instructor's Page
ENTC 3710
Introduction to the AXYZ CNC Router
 
20 x 20 Maze
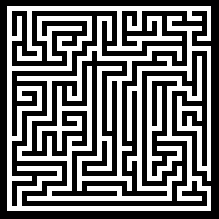
Lab #4-3
20 x 20 Maze

For this assignment, you will need to download
the project's DXF-formatted CADD file.
(Need help downloading and saving files
off the Internet? Click here!)

If you want to, you can
design and build your own maze.

The purpose of this lab is to familiarize the student with the process of turning a CAD file into a finished part using a proprietary CAM program (ToolPath) and then making the desired part on the AXYZ CNC Router.
The final deliverable package for this lab assignment will consist of the following:
  • A printout/plot of the drawing(s) used in this lab (including the location of all clamps and the drawing origin);
  • Setup instructions (in MS Word format) including a screen shot of the ToolPath Output window and instructions on how to properly secure the workpiece stock to the router table); and
  • A final part (standard size).
To Top of Page
Notes for this assignment:
  • The nominal, unscaled size of the project is approximately 5½" square; choose a suitably sized piece of stock for the project to allow for at least 1" per side for clamping. For this project, use an inexpensive and soft (i.e., easily routed) material such as plastic, tempered hardboard, MDF oak, or walnut.
  • Appropriate provisions must be made to securely clamp the workpiece to the router table. Allow at least 1" of additional edge for this purpose. The instructor must approve the final setup prior to the student running the program.
  • The drawing origin (X0,Y0 ABS) must be located in the parts' upper right corner at least 1 inch from the outside edge of the part.
  • The router paths will be generated using the existing AXYZ tooling. For the maze paths, consider using the center-cutting round over bit; the depth of cut can be set between 0.032 to 0.090 (½ part thickness maximum). Use the ¼" DIA straight cutting bit (Tool #1) for the final through cuts.
  • The minimum part thickness will be 1/4" thick. The thickness of the stock will vary depending upon the final approved material. If the final part is to be over ¼ inch thick, use the multipass option in the Output window; the maximum depth of cut of Tool #1 is 0.188.
To Top of Page

Making Your Own Maze

Making your own maze can be a pretty straight forward process:
  • Find an electronic image of the desired maze. (e.g., scanned bitmap image, digital photograph, or capture an image of a maze developed from an online source such as Maze Maker. (See maze making hints below.)
  • Open an appropriate CADD application (e.g., AutoCAD) and import the raster image of the target maze.
  • Turn on the Grid and set the grid spacing to 0.125".
  • Move the drawing origin to coincide with the center area of the lower, left hand-most part of the path.
  • Rescale the bitmap image so that the grid points fall in the middle of the pathways.
  • Create a layer called "Maze Image." Select the bitmap image and move it to the named layer. Lock this layer.
  • Create a layer named paths and change the layer color to a contrasting coloer (e.g., red). Make this the default layer.
  • Activate the Grid Snap option.
  • Use the Line tool to create the linear pathways snapping from path corner to path corner.
  • After the pathways have been created, turn off Grid Snap.
  • Use the "pedit" command to join multiple path lines into a single continuous path throughout the entire maze.
  • When you are finished converting all pathways to polylines, save the drawing as a Release 12 DXF-formatted file.
To Top of Page

Maze Making Hints

For starters, use a "small" and simple rectangular or square maze. The 20 x 20 sixe is a good choice; not too hard to make but too trivial to solve. Use the following settings when creating your on-line maze:
   Maze width? 20
   Maze height? 20
   Path width (in pixels)? 10
   Wall width (in pixels)? 5
The above values will make make it easier to scale the imported raster image in the CADD application to match the recommended 1/8 inch grid spacing.
To Top of Page
Back to the top of this page Back to Projects page
Website Copyright © 2000-2010 by Bill Hemphill   All Rights Reserved
April 12, 2010